- 1 network card in each PC.
- An RJ45 crossover cable.
- And of course, a RJ45 UTP cable tester to check out whether the cable is correct.
Connect the wire's ends in each of the network cards (specifically in the female port RJ45) and verify that the port's LEDs be switched on, this on both PC's.
If all goes well, let's start.
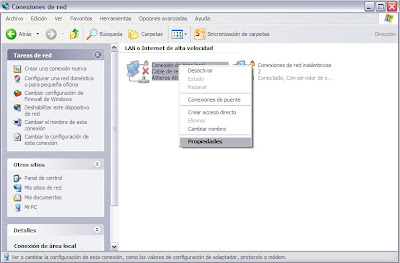
- Open the Control Panel, double click "Network Connections" then right click on "Local Area Connection"and select "Properties. "

- Now set up the IP address of each PC, select the "Internet Protocol TCP / IP" then select "Properties. " Each PC must assign an IP address, this can be done automatically or manually preference. Usually they assign these addresses:
PC1
IP Address: 192.168.0.1
Subnet Mask: 255.255.255.0 (appears automatically)
PC2
IP Address: 192.168.0.2
Subnet Mask: 255.255.255.0 (appears automatically)
IP Address: 192.168.0.1
Subnet Mask: 255.255.255.0 (appears automatically)
PC2
IP Address: 192.168.0.2
Subnet Mask: 255.255.255.0 (appears automatically)
- Now we see that the two PC's actually belong to the same workgroup. To do this, right click on My Computer and select Properties.
In the "Computer Name" tab, you will see the computer name and the workgroup in which it's located. Click "Network ID" to modify the workgroup, it is preferable that two PCs are in the same workgroup.
- The next step is to check that the two PCs to communicate well. To do this, open the command prompt (MS-DOS window to win 98): Go to Start / Run and type "cmd" (without quotes)
On PC1, type the command ping 192.168.0.2, so you can check if PC1 sees PC2. In PC2, type the command ping 192.168.0.1, you can check the opposite of previous step.
- The next step is to share folders on each PC, right click on the folder you want to share, select "Share", assign a name to the folder that will be seen on the net.
- Right click on the icon "My Network Sites" on the desktop, then select "Explore"(Note: There is a difference between Explore and Open), click on "All Network", then the working group, so you'll can see the PCs as well as all folders and files they share.
And that's all, let's start to share data!
If you want to see the Spanish article, click here.


No hay comentarios:
Publicar un comentario